Table of Contents
Regioning
On MCAU we use regions to keep players builds and property protected from all other players. A region by default will allow only the player that created it to build in the area. Regions also protect armour stands, animals from being killed, and access to Chests / Shulker Boxes. Other players (or 'members') can be added to regions, allowing them to build while you (the 'owner') still hold control over the more advanced things such as flags and other permissions.
All players are able to create regions with areas up to 200,000 blocks, using a few simple steps. For a guide in-game, check out /rhelp, which has information on how to region, some advanced commands, and information on how many regions and homes are available to players at each rank.
Note: Region boundaries can change how some game mechanics work. For example, leaves won't grow on trees, or pistons won't push blocks through boundaries. If you need this to happen, overlap the boundary with another of your own regions to get things working properly.
Step-by-step Guide
This is a more in depth guide to help you better understand how regioning works. While there are more steps and details here than at /rhelp, the process and end result remain the same.
Step One: Obtaining a Wand
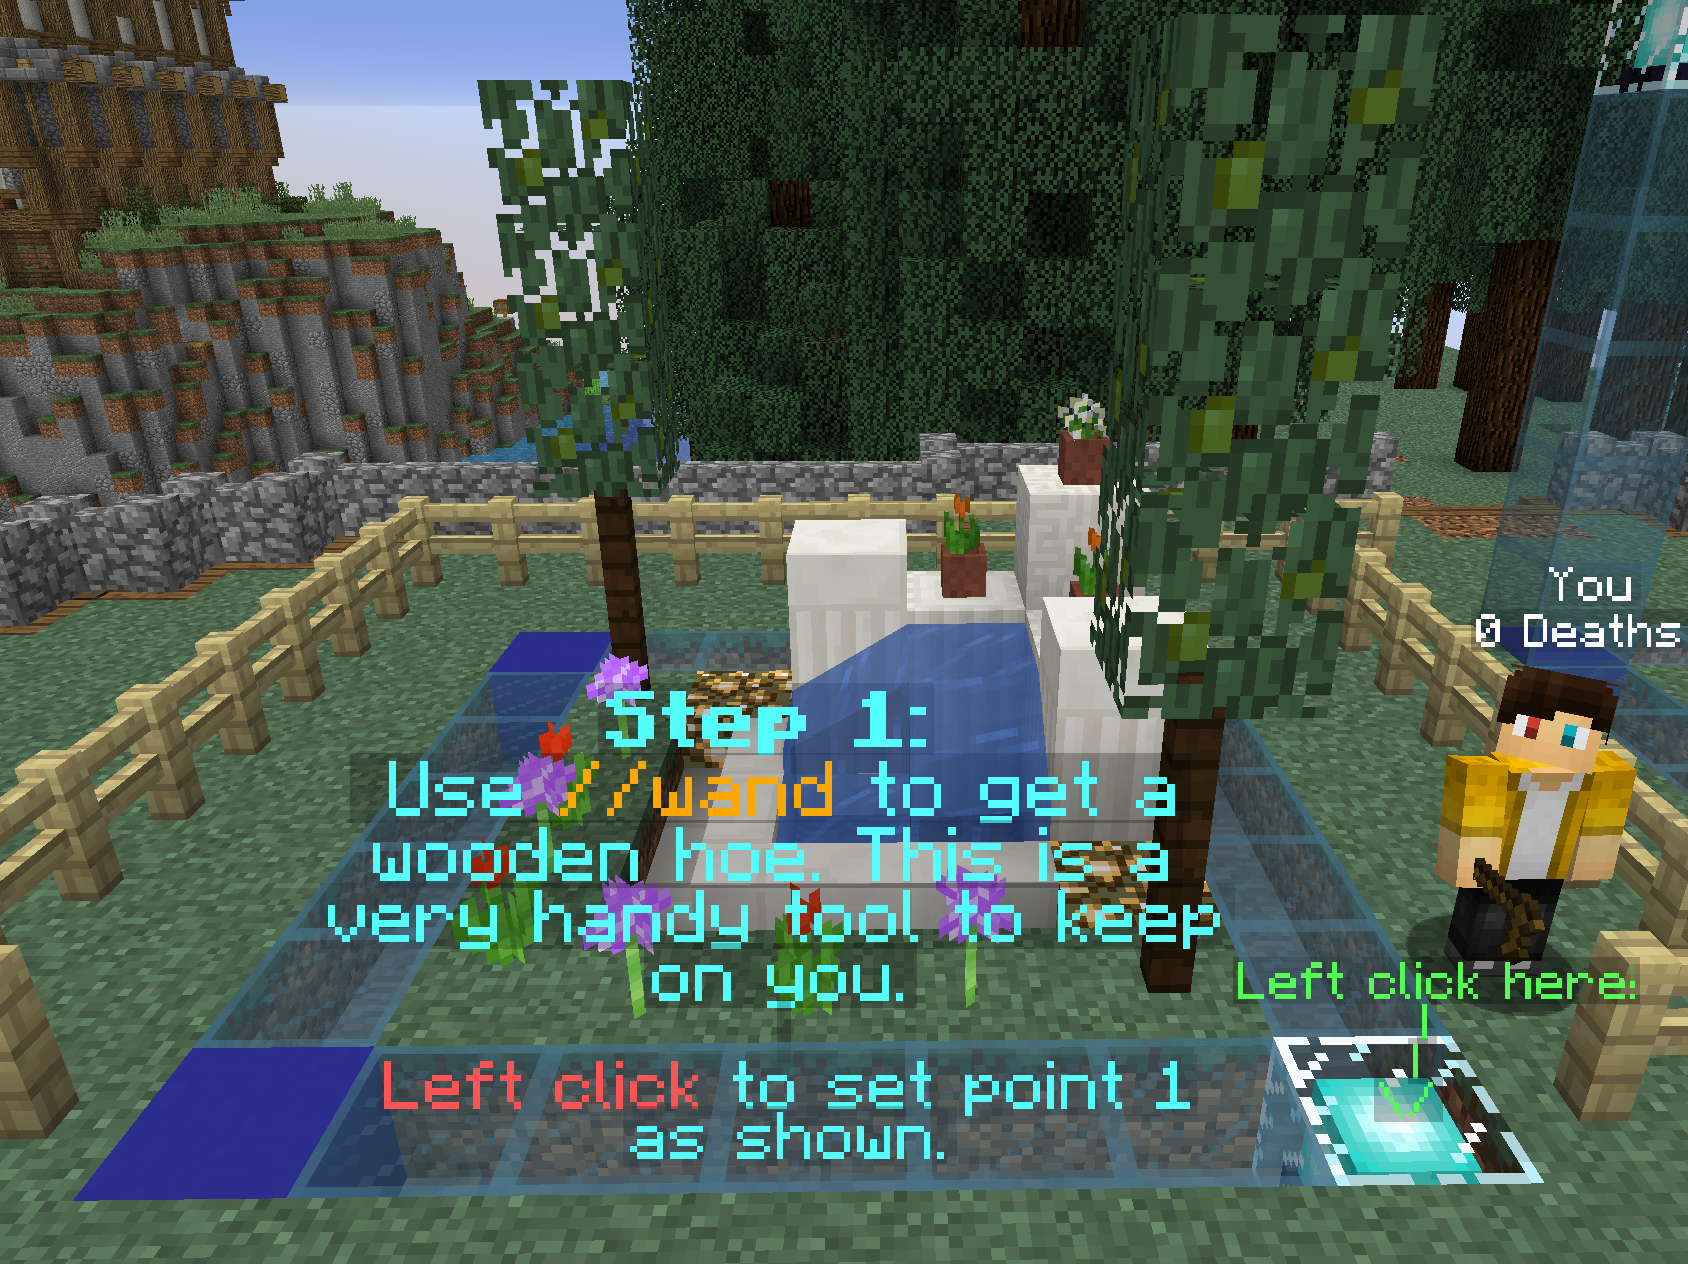
This easy step only involves typing //wand in game, which will give you a Wooden Hoe. This is a handy item to keep on you.
Step Two: The first point
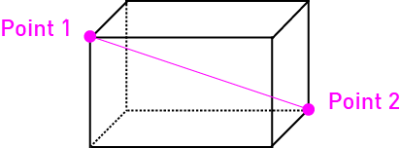
Imagine a region as a cube that surrounds your building area. The two points that tell a region where to exist are the most opposite points of that cube. So say you have a house with a fence surrounding it. Point One will be the lowest point, underneath the corner of your fence. Left Click this block with the Wand to set this point.
You will get a chat bar notification that the First Position is set, and co-ordinates.
Step Three: The Second Point
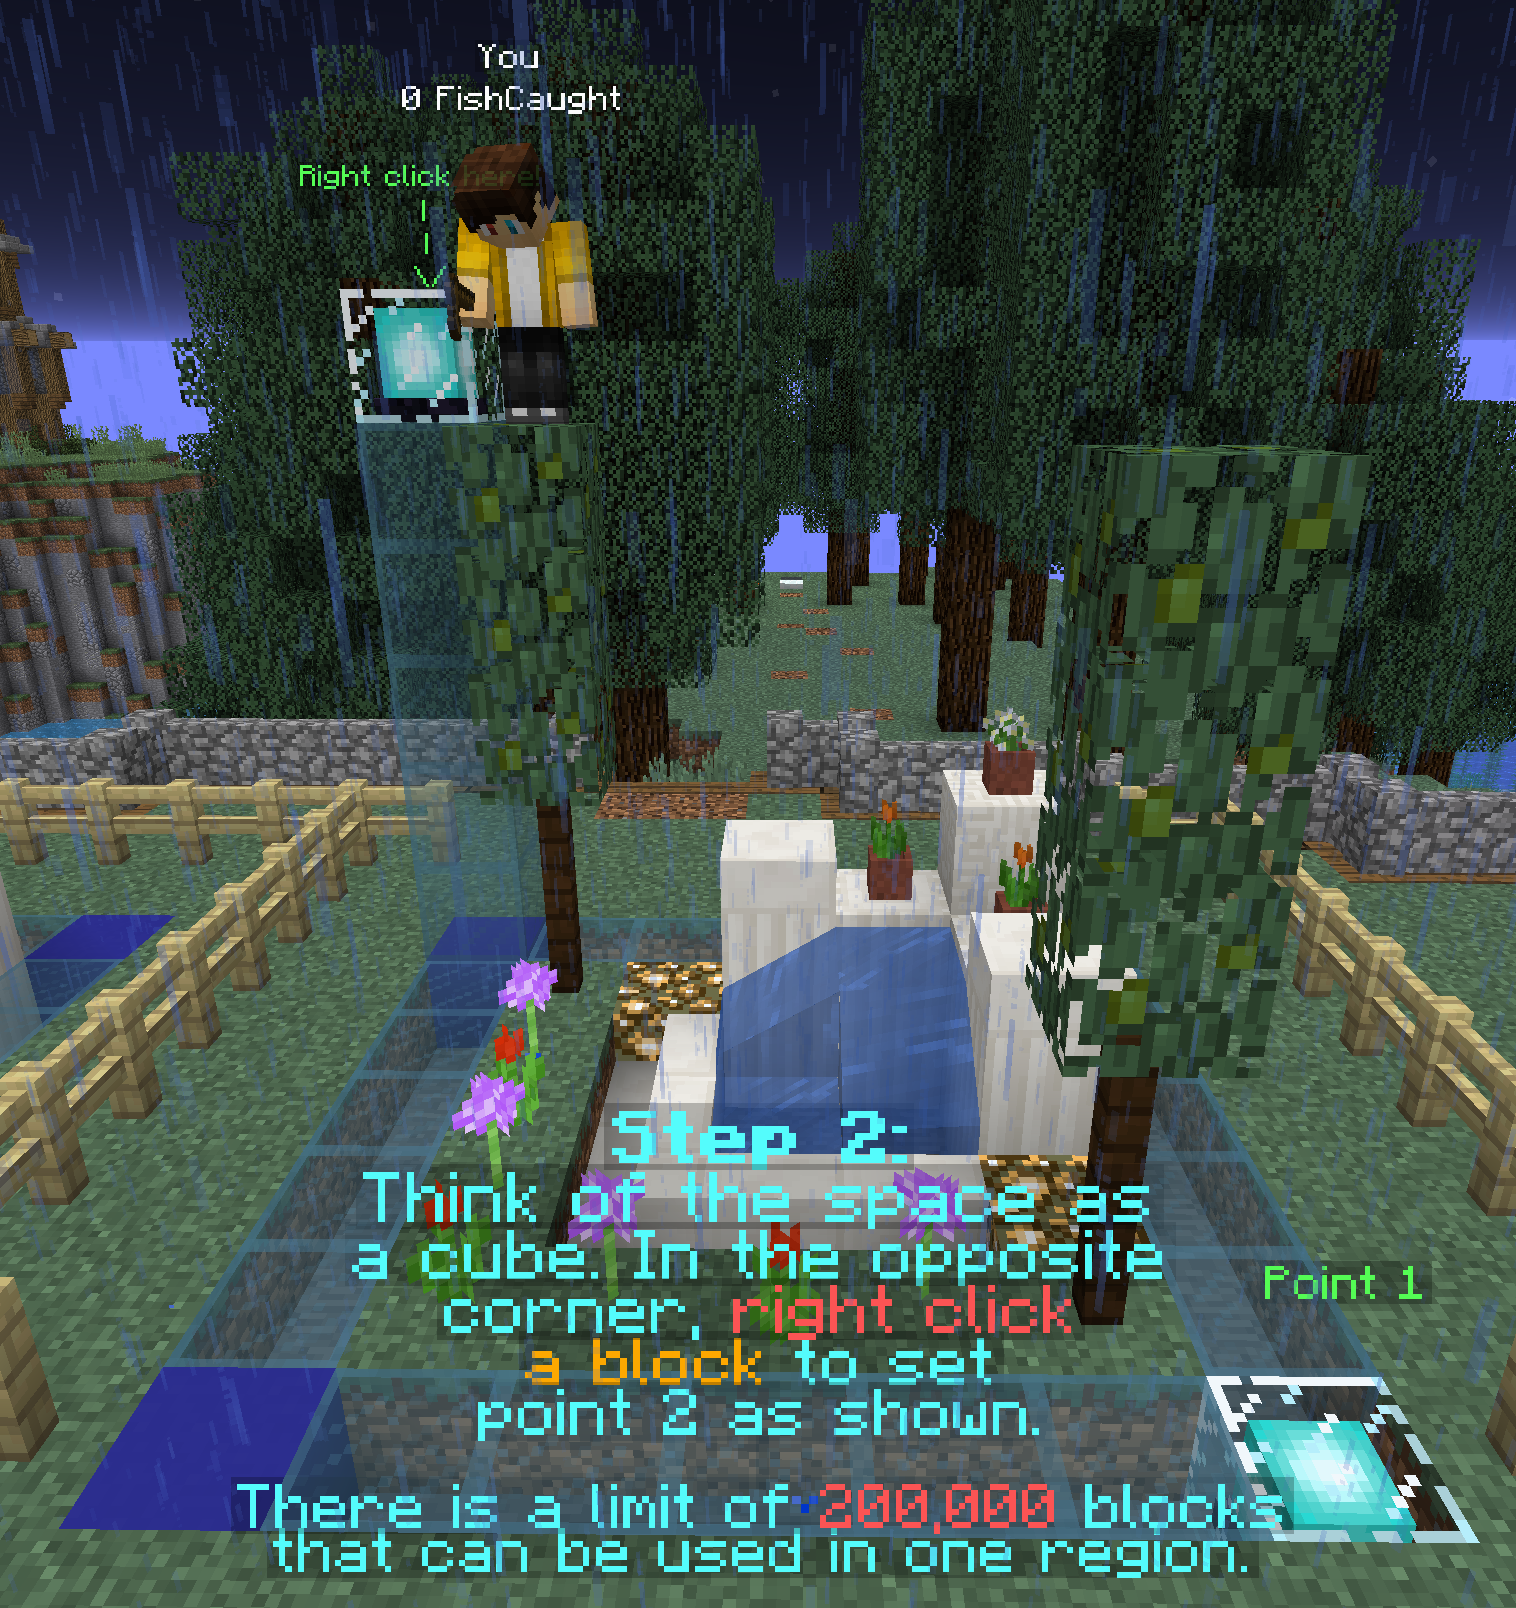
The most common mistake of regioning is thinking that the opposite corner is the other corner of the fence. Whilst this is the opposite corner of a square, it is not of a cube, and so the region will not cover anything above the ground. To cover your whole house, you'll need to select a point in the air.
A natural point may already exist. Otherwise an easy method is to build a dirt tower temporarily to create a point. Once you get high enough to get over any area that you want protected, Right Click the block with the Wand to create Point Two.
You'll once again get a notification that the Second Point is set with more co-ordinates.
Step Four: Check Your Work
At this point, there are a few things you can do to check your region before claiming it.
/wesvprovides an outline of the area selected, giving you a visual representation of the borders of your selection.//sizeprovides you with detailed information, including your point co-ordinates, the lengths of each dimension, and most importantly, the size of the area. Again, remember a region can't be more than 200'000 blocks, so if it is, set a Second Point lower down or closer in.- If the region doesn't quite cover what you need there are also commands to assist you.
//expand <#> [direction]will expand your selection, with directions being North (n), East (e), South (s), West (w), Up (u) or Down (d). If you don't specify a direction, it will expand in the direction you're facing.//contract <#> [direction]will reduce the selection size. Note: This contracts the side of the cube opposite to what you type. For example, if you use//contract 10 w, it will contract the eastern side west to reduce the size.//contract 10 dwill contract the top face downwards.//outset <#>expands by the amount in all directions at once. If you add-hor-vto the end, it will only expand horizontally or vertically.//inset <#>contracts the amount in all directions.-hand-valso work at the end of this command.
- If you think you need to start over,
//selwill de-select your region, giving you a fresh start on choosing points.
There are also examples at /rhelp to show what happens if you set Point Two wrong.
Step Five: Claiming Your Region
Once you are satisfied that your region covers your build, simply use /rg claim <regionName> to finalise the region. You can do a last check by hitting a block with a Stick, which will inform you of what regions that block is in.
Instead of using a stick, you can also use /rg info <regionName>, which will tell you a lot of information, including the size of the region, who owns it, any members that can build in it, and what Flags are enabled (which are explained below).
At this point, your build should now be safe from Grief, and you can relax!
Advanced Commands
As the Owner of a region, there is much more that you can do with regions once they exist. Add members to allow them to build, tweak flags to changes settings, or alter the region itself.
/myregionswill show you a list of all regions you own or are a member of./rg addmember <regionName> <player>adds another player to your region as a Member, allowing them to build, but not modify region settings. A member also doesn't have the region counted to their alloted regions for their rank, allowing them to be a member of as many regions as they wish./rg removemember <regionName> <player>removes a player's permissions to build in your region./rg sel <regionName>sets the region as your current selection (as if you'd set the points). This is handy when used in conjunction with reclaiming./rg reclaim <regionName>allows you to use your current selection to update the size of a region, for if you need to expand out a bit as an example./rg flag <regionName> <flag> <value>gives your region a flag, which changes how certain things happen inside you regions. If you leave the <value> as blank, it will remove the flag from the region. A list of flags and descriptions are as follows:


